The VIS.X® SDK for SwiftUI dynamically adjusts the size of an inline banner position to realize high-impact effects, such as the YOC Understitial Ad®.
To unlock the full potential of YOC’s high-impact advertising formats, it’s advised to integrate the banner placement inside scrollable content and allow resizing of the adContainer upon request.
An adContainer is needed to perform an ad call. It requires a VIS.X® Ad Unit ID (provided by YOC) and a VisxAdSize.
- Importing VisxSwiftUISDK to your View
- Initializing VisxView for an ad request
- Rendering your ad into your View
- Implementing VisxEvents
- Providing the anchorFrame to VisxView (optional)
Importing VisxSwiftUISDK to your View
First, import VisxSwiftUISDK into your View.
import VisxSwiftUISDK
Initializing VisxView for an ad request
A VisxView is a SwiftUI View and represents an instance of an ad you want to deliver. You simply have to create an instance.
let visxView = VisxView(adUnitId: "123456",
                        domain: "domain-of-your-app-ads-txt.com",
                        size: .kMediumRectangle300x250,
                        universal: true)
| Parameter | Description |
|---|---|
adUnit |
VIS.X® Ad Unit ID (provided by YOC) |
domain |
Domain where the app-ads.txt is located. Example: For “https://yoc.com/app-ads.txt" it would be “yoc.com” |
size |
size is the default size of your adContainer and is a combination of CGSize and VisxPlacementType. You can either set your own size VisxAdSize(adSize: CGSize(width: 300, height: 250), type: VisxPlacementType.inline) or choose a predefined one, such as kMediumRectangle300x250. A list of predefined IAB ad sizes can be found here. |
universal |
Always set to true. Setting it to false will deactivate YOC high-impact ads and resizing and will negatively impact your revenue. |
Rendering your ad into your View
Once you have initiated the VisView, you can use it in the body of your View.
var body: some View {
    ScrollView {
        ForEach(1..<30) { row in
            if row == 10 {
                visxView
            }
            Text("Sample Text")
        }
    }
}
Implementing VisxEvents
Instead of using Swift delegate methods, VisxView has a method that can receive all VisxEvents (e.g., visxAdViewDidInitialize, visxAdViewSizeChange, etc.) which are available for UIKit.
visxView.onEvent { visxEvent in
    // visxEvent is a VisxEvent enum of type string
    print("visxEvent: \(visxEvent)")
}
public enum VisxEvents: String {
   case visxAdViewDidInitialize
   case visxAdViewSizeChange
   case visxAdViewEffectChange
   case visxLandingPageOpened
   case visxAdViewClosed
   case visxAdViewClicked
   case visxAdVideoFinished
   case visxAdRequestStarted
   case visxAdInterstitialClosed
   case visxAdInterstitialWillBeClosed
   case visxAdResponseReceived
   case visxAdFailedWithError
   case appShouldResumeFromAd
   case appShouldSuspendForAd
   case visxAdViewDeallocated
   }
Providing the anchorFrame to VisxView (optional)
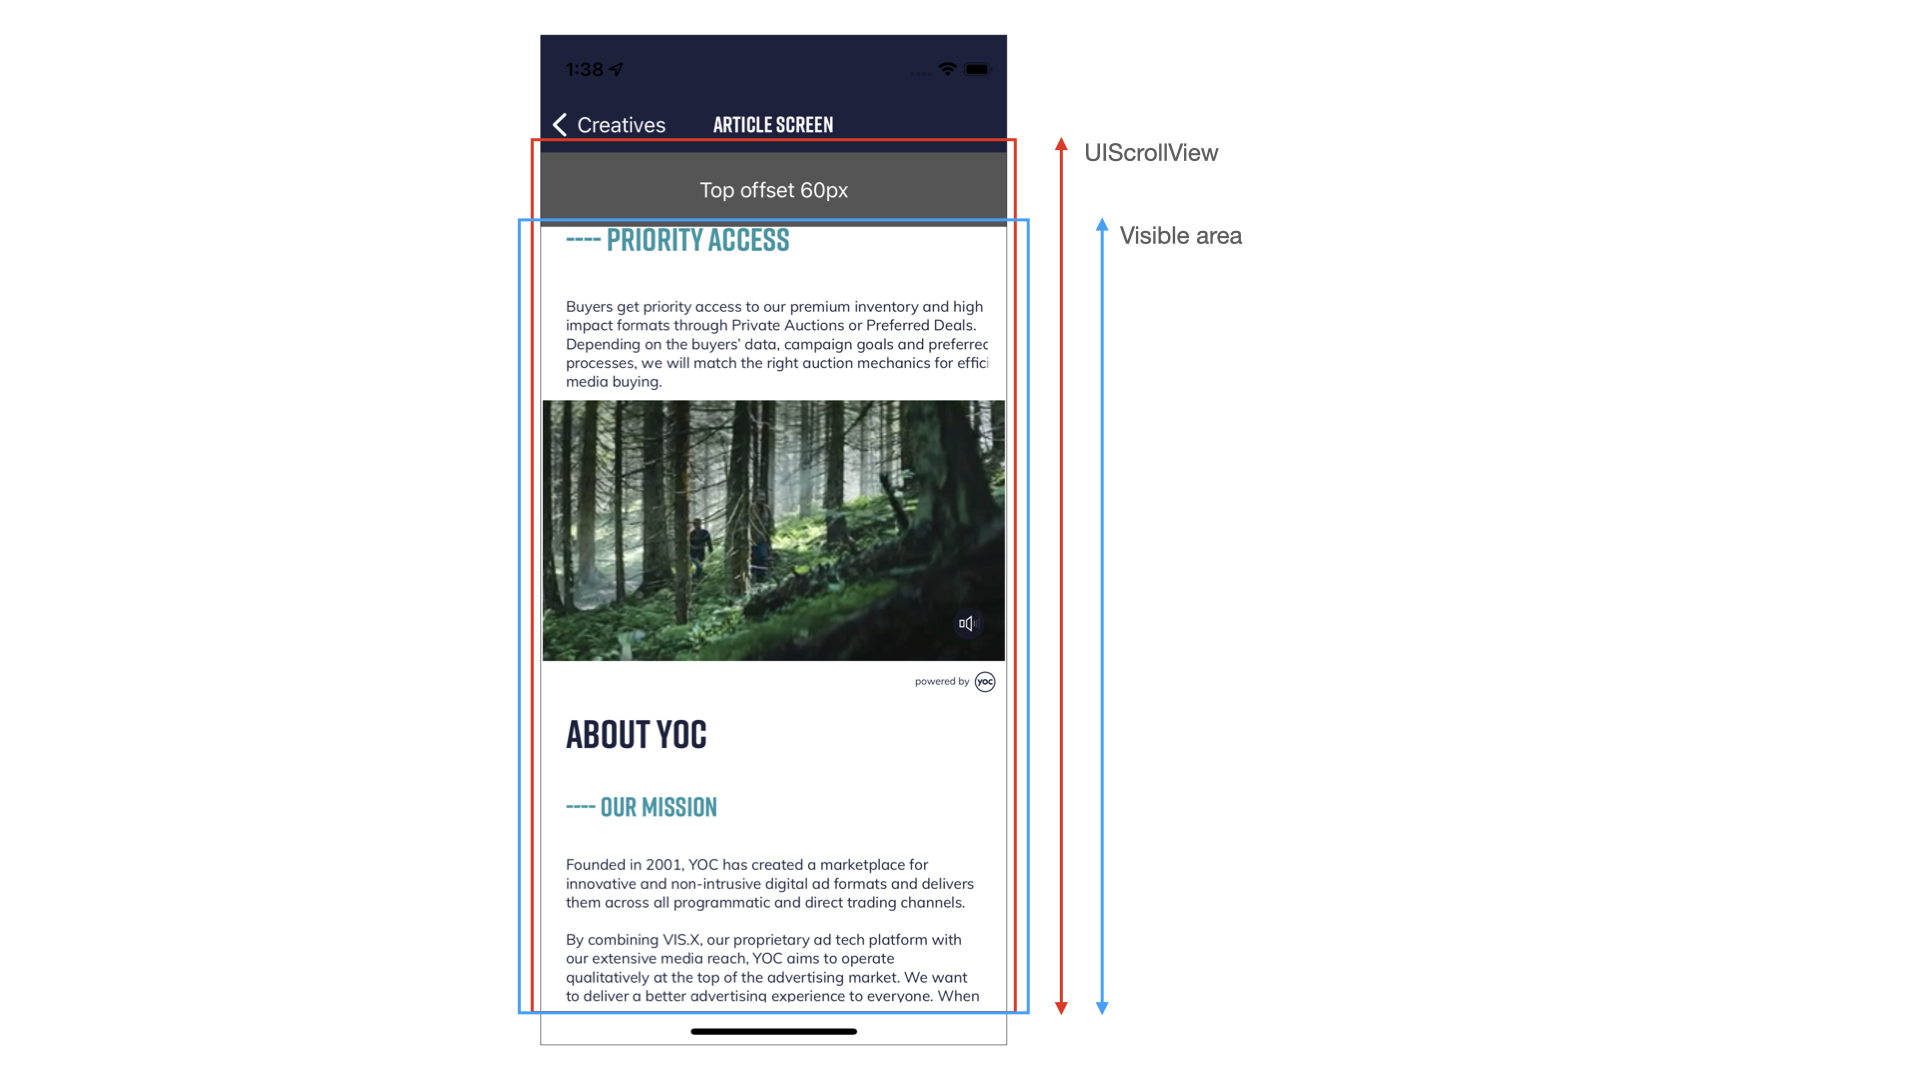
In case of complex app layouts, e.g., static decorative UI elements, or custom positioning of a View that holds the content, you may want to provide position and size manually to the VisxView. The viewable part of the content View is called anchorFrame in the SDK.

You can define the anchorFrame during the initialization.
let visxView = VisxView(adUnitId: "123456",
                        domain: "domain-of-your-app-ads-txt.com",
                        size: .kMediumRectangle300x250,
                        universal: true,
                        anchorFrame: CGRect(x: 0, y: 132, width: 393, height: 720))
Your inline placement is fully set up and ready for testing.
We advise you to share a build of your app with the YOC Service Team, to validate and fully test the integration together. Reach out to your contact at YOC to request test resources.